
The lower section of the River Dart is a deep water natural harbour with a long history of maritime usage. In modern times, the port's commercial activity has declined, but it's still busy for a wide variety of yachts and other private boats. Several local companies specialise in shipbuilding and repairs to small tonnage craft.
Dartmouth is also the home of the Britannia Royal Naval College, and as a result is routinely visited by sizeable naval ships. Smaller tenders are often seen carrying out training exercises in the harbour and river, while large cruise ships are occasional visitors.
The original broad gauge line to Kingswear was built by the Dartmouth & Torbay Railway, opening on 16 August 1864, but this shows how the station looked and ran in the 1940s. This page shows how we went about creating the natural landscape and sky which defines this railway's unmistakeable character.

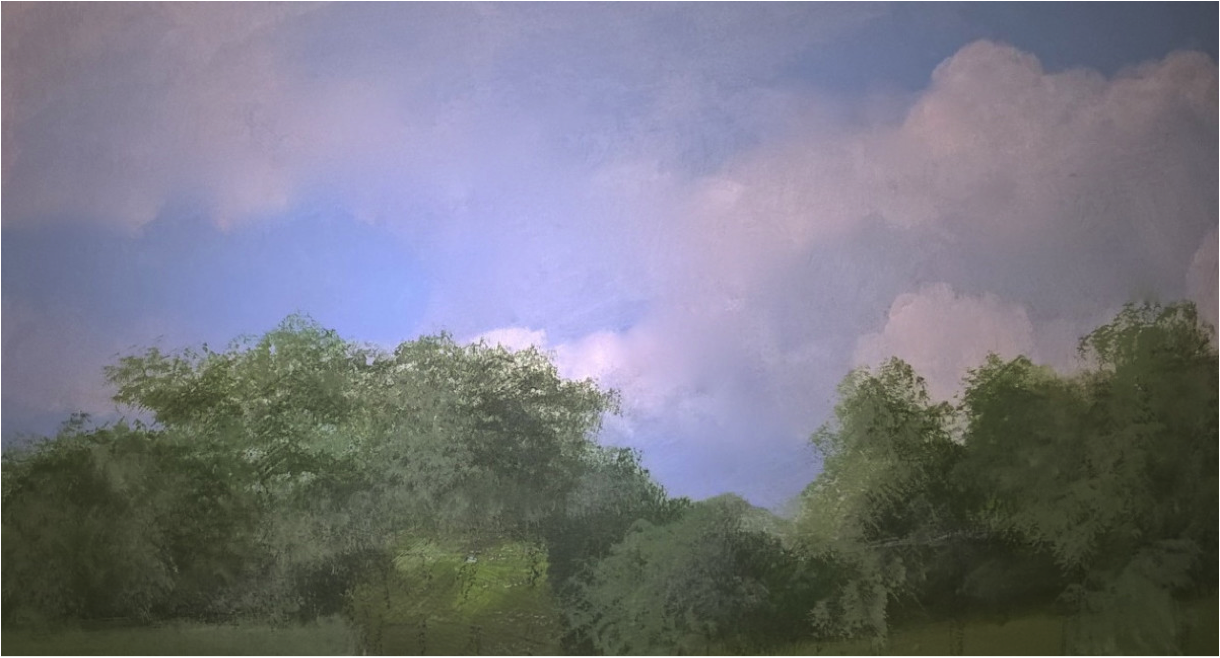
Windy sky panel above Hoodown
|
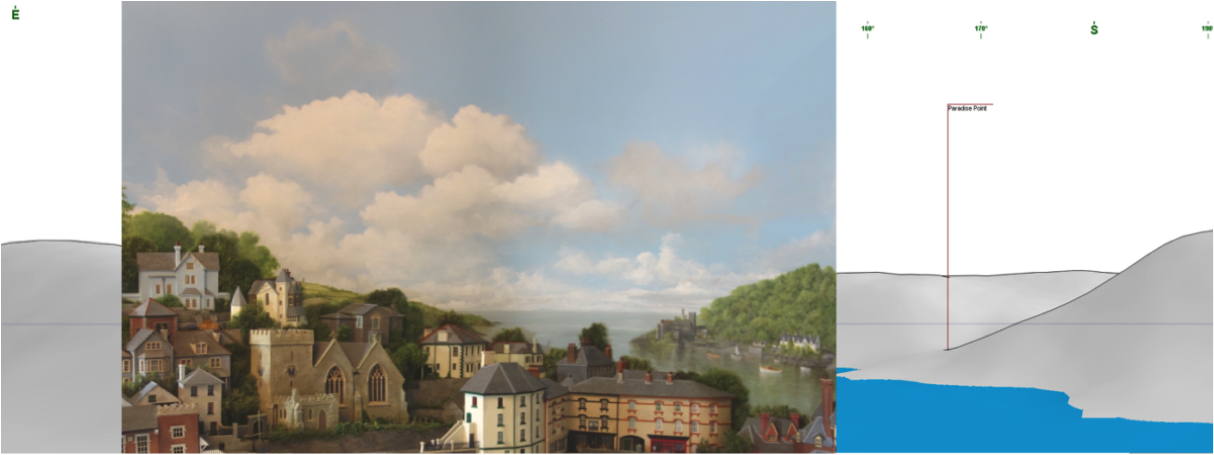
This small sequence shows one aspect of the landscape plotting process, starting with a look from the viewpoint to confirm the correct contour profile in 'Generate a Panorama', using a south east view with a 160 degree sweep.
|

|

|
The digitally plotted contour rendering of the land masses on either side of the River Dart looking South East, with a view out to the English Channel.
|
|
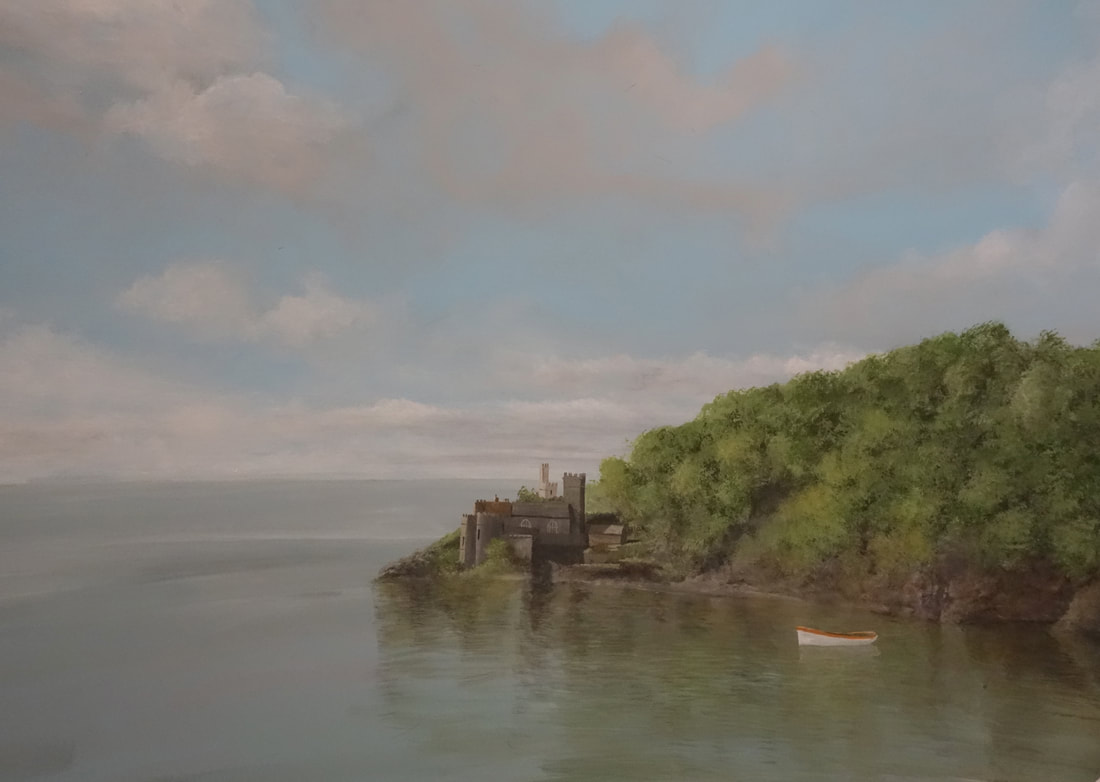
The beginnings of a view to the south from the ferry, looking out to sea, with the far horizon, One Gun Point, St Petrox Church and Warfleet Creek to the right. It needs a lot more detail, and definitely some more boats, but the 3D rendered headland that forms the foundation for Kingswear itself will eventually obscure part of the horizon from this viewpoint.
|
|
|
3D work in progress, overlaid onto the digital contour landscape, and the feint blue horizon datum corresponds to the far sea to sky line.
|
|
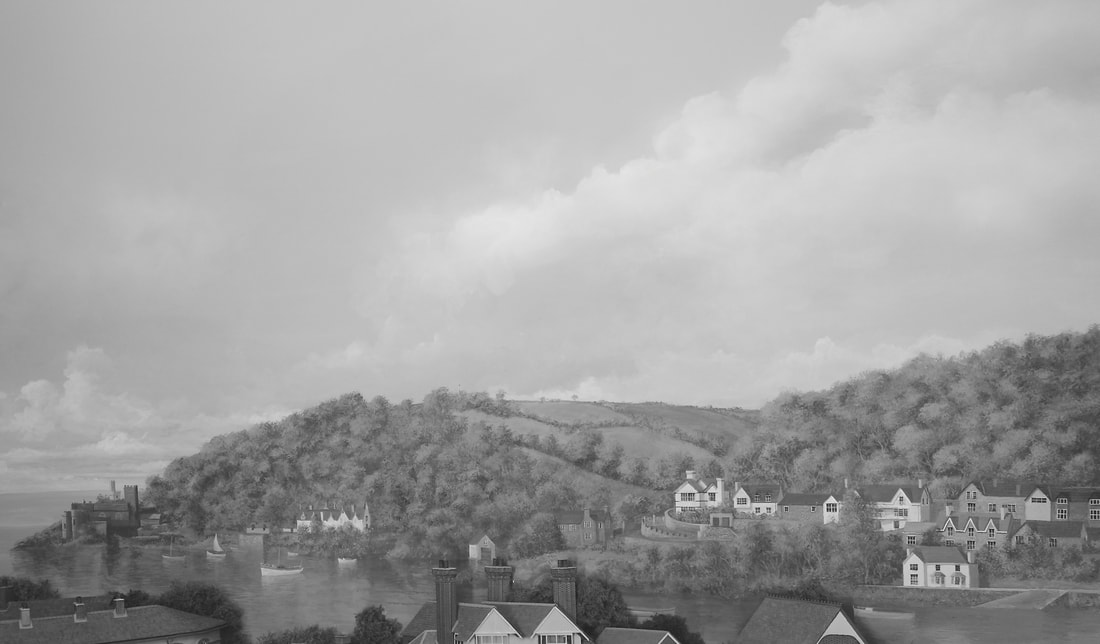
The opposite riverbank is all done as a hand painted representation from old postcard and photo reference, showing the last few houses and old stone walls to the south of Dartmouth, and the cleared fields rising up from Warfleet creek over Weeke Hill (at centre).
|
|
The aluminium rear panels are scurfed, primed and base blue painted before hand painted cloud configurations are added in acrylic artist colours. These 2D trees appear at skyline just to the north of Kingswear looking east, and they will be partially obscured, forming the backdrop to a layer of relief trees.
|

The panel for the Greenway tunnel scenic break is quite different, and high, layered clouds appear now from horizon, to break their formations while still over far distance. These will be partially obscured by the skyline trees growing from the high contoured land surface above the Greenway tunnel mouth.
|
Neil has kindly provided us with the first few descriptive notes on the techniques and materials he has used to produce Kingswear's scenic and tree cover.

As I progress up towards the horizon, the armatures gradually peter out until all I'm left with is the idea of the tops of the late summer canopy. At this stage it's purely either rubberised horsehair, or just the teased fleece lining covered in the finest of scatter sieved through a tea strainer. This is the transition from village to woodland, so we don't have a continuous tree cover, but areas of cleared ground for roads buildings and garden plots.
|
The tree canopy on Kingswear has been made using a few different techniques. They are varied because we have used forced perspective to give a more believable, greater depth to the scene.
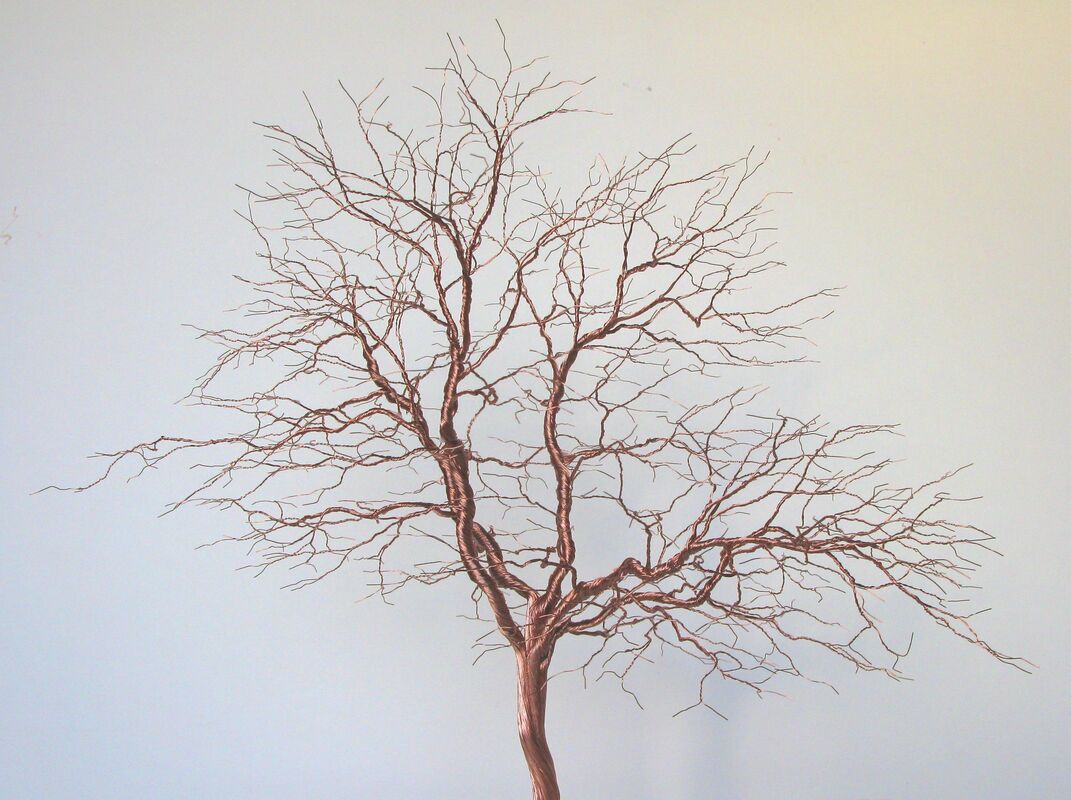
I begin with the tree line at the base of the scene that then enables me to work upwards and towards the horizon in this particular case, reducing the perspective as I go by making the trees smaller the further away they are. The first trees are a mixture of fine twisted copper wire covered in either a 'super glue bark' and spray painted, or a bark mix created from grey-green coloured paint, PVA glue and ordinary finishing plaster. The initial form of the foliage is created using teased out and painted fleece lining (Woodland Scenics Polyfibre also) over the armatures being careful to show some of the branches followed by a good dousing of various Greenscenes, Polak and Anita Decor scenic scatters and flocks, glued using sticky cheap hairspray followed by matt varnish to fix it all in place. These are then 'planted' in the terrain. Once sited some 'less detailed' trees are placed around, between and behind them to create that late summer density of tree cover. These use rubberised horse hair, covered in the same way as the armatures. |
|
Trees start out as copper wire armatures, superglued for strength, or occasionally dressed sea foam. Good research and reference are essential; nothing modelling-wise is undertaken without studying period reference material first. I make much use of the modern modelling phenomenon of static grass as well as using other techniques based on 'old fashioned materials' such as dyed carpet underlay and twisted florist wire for conifers (I'm also not averse to using natural products such as plant roots to create trees and bushes etc).
|
|
|
|
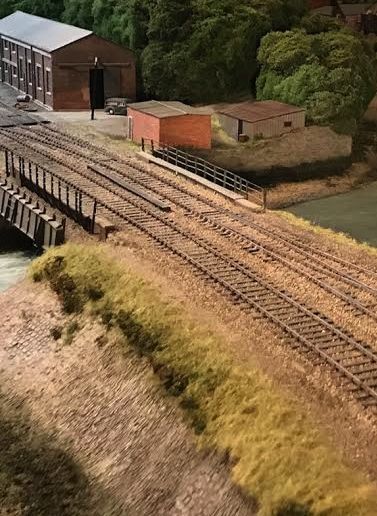
The riverbank stone retaining walls are created with plaster moulds, taken from the existing hand-scribed walls that were already in place on the layout. Some pieces were slightly damaged and had to be infilled with plaster and re-scribed to match the existing work.
They are painted with various stone colours from the Super Matt Omen Miniatures range of paints, before a dark enamel wash is run over them to bring out the shadows, nooks and crannies of the stone. Finally an almost white-stone colour is dry brushed just touching the surfaces that protrude the furthest to suggest highlights. 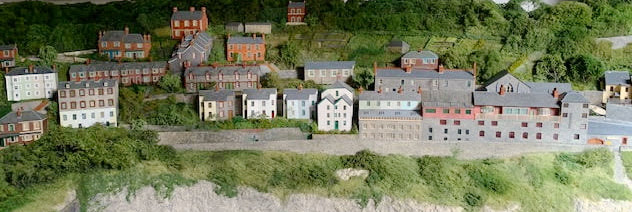
Ground level foliage on the slope behind the railway, and below the retaining wall for the Brixham Road and Riverside Wharf.
|
|
|
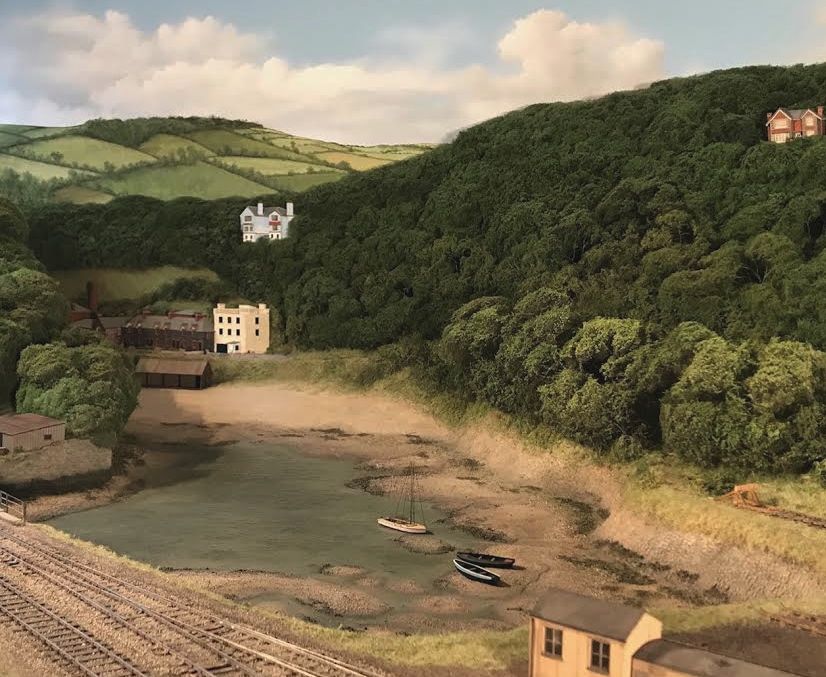
Waterhead Creek was accomplished initially through drawing out where the low tide mud flat areas would be, based on photographic reference. Once the areas above the waterline were established, they were then formed in pre-coloured plaster flowing gently down from the bank or retaining walls to the waterline. Many tests were undertaken in order to get the colour right, but even then much painting has ensued! Whilst the plaster was wet, I gently stippled it to suggest texture on the mud flats where it had dried out, but as I got to the waterline it became more and more smooth as if the water had only just left that part of the land. I also created the rivulets or small runs of water that gradually fade as the water leaves the Creek at the same time with a finger and other blunt implements!
This was followed up with the painting, with the waterbed being painted first, using reference, and in the usual fashion of being darker in the deeper areas and lighter in the shallow areas. I also suggested using a very dark blue-brown seaweed under the water surface. The colours used were acrylic initially; grey/green in nature, followed by the airbrush to blend them together. |
We wanted to portray the ebb tide, so a darker area on the mudflats was suggested at a level distance up from the waterline. The water was created with a Woodland Scenics Realistic Water Effects product. It is high sheen but also thick in texture so it allowed me to create gentle ripples that stayed and then went solid. Again, I used reference to suggest where the ripples were at their largest and at their least in order to give hopefully the most natural effect.
The seaweed was all undertaken using Treemendus fine scatter material (I believe it's a cork based material), and it's one of the darker shades in Anthony's range. It was glued in place and then even though pre-coloured, it was painted with a dark enamel wash to bring out the detail, the shadows and to create the actual colour of the seaweed at Kingswear. I researched the seaweed that exists there in order to make sure we have it correct on the model! The other detritus are various sizes of ballast/stone, sand and even very fine Oak sawdust. This is all stuck down with a PVA-Alcohol-Water mix.
